


FireBlock Meets Fireduino
Update time:2018-04-13 Views:4486
Introduction
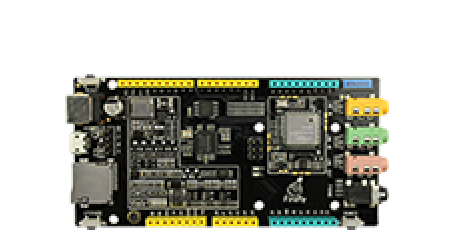
We now introduce how to connect FireBlock to Fireduino board.
FireBlock communcates with Fireduino board using Firmata protocal. You need to flash the Firmata firmware to the board.
You have to make the Arduino IDE ready to develop with Fireduino. If in doubt, please check the quickstart articles in the Wiki Main Page.
Flash Firmata
Fireduino is required to flash specific version of Firmata. Take the steps below:
① Open Arduino IDE, and in menu "Tools->Board", select "Fireduino":

② In menu, select "File -> Examples -> Firmata -> FireduinoFirmata":

and get:

③ Modify the network configuration. You need to specify you WiFi's SSID and password here.
If a static IP address is prefered, uncomment STATIC_IP_ADDRESS, and modify it to a valid IP address unoccupied by other devices:

Generally you are suggested to use static IP address. Otherwise, you need to find out the actual board IP address via methods such as looking at the serial output of the board, or the DHCP log of your wireless route, and the IP address may be dynamicly changed, which cause a lot of trouble.
For example, if you need to use staitc IP address "192.168.1.113", delete the comment string "//" before STATIC_IP_ADDRESS, and modify the content.

Pay attention here, the "." needs to be replaced with ",", which is required by the Firmata code.
④ Connect Fireduino to PC with USB cable, and put the board into upgrade state (which is a matter of keeping the "UP" button pressed, short pressing the "RES" button before finally releasing "UP" button.)
⑤ Press "upload" button in the toolbar. The IDE will compile the program, and flash the firmware into Fireduino:

Once success, it will prompt:
Upgrade firmware ok.
The flash of Firmata is completed.
Insert TF card
By default, it it required to insert the TF card for the firmware to work. If it is not inserted, the LED will blink quickly forever and the board cease to work.
If you do not need to play music file in the TF card, you can remove this restriction, by commenting out the following code:

After modification:

And finally press "Upload" button to flash the modified firmware.
Connect in FireBlock
First, please make sure the PC or tablet running FireBlock shares the same wireless route or ethernet with Fireduino board. This keep things simple.
Click the link FireBlock, switch to "Fireduino" category, and drag the "connect" block into the scripting area:

Click the editbox inside, input the IP address of the Fireduino board, which has been flashed with FireduinoFirmata.

Then click the "connect" block (not the editbox inside). The block is displayed with glow around, which indicates that it is running the connect action. In the meantime, a message dialog is popuped:

Once connected successfully, Fireduino board will blink the LED regularly to show the major and minor firmware version number, and FireBlock will display a dialog showing the result:

If connection is failed, FireBlock will popup the error dialog:

In this situation, you need to check the message in the serial console. The most common reason are:
TF card is not inserted (and the check code is also not commented).
WiFi failed to connect with bad SSID or password.
IP address is not matched.
Control Fireduino
You have now succefully connect FireBlock to Fireduino board. Please click here to write your first FireBlock script to control the Fireduino board.


