


TFT display char
Update time:2018-04-13 Views:6885
Fireduino TFT
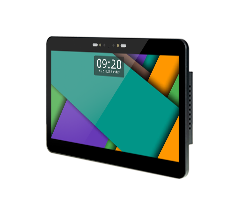
Fireduino TFT adopt with traditional Arduino TFT belong to a series of LCD driver for ST7735S,with Fireduino through I8080 interface connection,refresh rate is faster than traditional way SPI of Arduino TFT.
Fireduino TFT Library
Fireduino TFT library is based on ST7735S drive extended Adafruit GFX,Adafruit GFX is responsible for drawing graphics,ST7735S is responsible for drive LCD display,it is compatible with Adafruit GFX API,after Fireduino connect TFT,as show below:

Fireduino TFT display character
This example demonstrates how to draw text on TFT accessories of Fireduino,at regular intervals loop read Fireduino analog input port A0,and to display its value on the TFT screen.
Hardware requirements
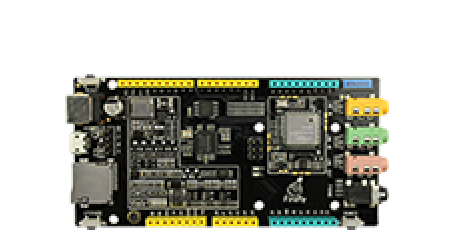
1.Fireduino board
2.Fireduino TFT board
Code
Before the start
Use TFT screen,first of all have to contain TFT library header files.
#include <TFT.h>
Define your TFT screen,and create an instance object
TFT TFTscreen = TFT();
Update the screen text messages,you need a buffer
char sensorPrintout[4];
setup()
1.Initial screen
2.Set the background color
3.Set the font color via stroke()
4.Set the text character size
5.Write the static text into screen.
void setup() {
  // Put this line at the beginning of every sketch that uses the GLCD:
  delay(1);
  TFTscreen.begin();
  delay(1);
  // clear the screen with a black background
  TFTscreen.background(0, 0, 0);
  // write the static text to the screen
  // set the font color to white
  TFTscreen.stroke(255, 255, 255);
  // set the font size
  TFTscreen.setTextSize(1);
  // write the text to the top left corner of the screen
  TFTscreen.text("Sensor Value :\n ", 0, 0);
  // ste the font size very large for the loop
  TFTscreen.setTextSize(5);}
loop()
1.After reading from the external input voltage is converted to String.
2.Set the text color and write the text into the screen。
3.After the delay to clear the text just written.
void loop() {
  // Read the value of the sensor on A0
  String sensorVal = String(analogRead(A0));
  // convert the reading to a char array
  sensorVal.toCharArray(sensorPrintout, 4);
  // set the font color
  TFTscreen.stroke(255, 255, 255);
  // print the sensor value
  TFTscreen.text(sensorPrintout, 0, 20);
  // wait for a moment
  delay(250);
  // erase the text you just wrote
  TFTscreen.stroke(0, 0, 0);
  TFTscreen.text(sensorPrintout, 0, 20);}
Example program -- TFT character display
#include <TFT.h>  // Arduino LCD library// create an instance of the libraryTFT TFTscreen = TFT();// char array to print to the screenchar sensorPrintout[4];void setup() {
  // Put this line at the beginning of every sketch that uses the GLCD:
  delay(1);
  TFTscreen.begin();
  delay(1);
  // clear the screen with a black background
  TFTscreen.background(0, 0, 0);
  // write the static text to the screen
  // set the font color to white
  TFTscreen.stroke(255, 255, 255);
  // set the font size
  TFTscreen.setTextSize(1);
  // write the text to the top left corner of the screen
  TFTscreen.text("Sensor Value :\n ", 0, 0);
  // ste the font size very large for the loop
  TFTscreen.setTextSize(5);}void loop() {
  // Read the value of the sensor on A0
  String sensorVal = String(analogRead(A0));
  // convert the reading to a char array
  sensorVal.toCharArray(sensorPrintout, 4);
  // set the font color
  TFTscreen.stroke(255, 255, 255);
  // print the sensor value
  TFTscreen.text(sensorPrintout, 0, 20);
  // wait for a moment
  delay(250);
  // erase the text you just wrote
  TFTscreen.stroke(0, 0, 0);
  TFTscreen.text(sensorPrintout, 0, 20);}


