Analog I/O
Update time:2018-04-13 Views:6440
Operating Environment
Operating system : windows 7 Ultimate 64-bit
IDE : Arduino1.6.6
analogReference()
Description
Configures the reference voltage used for analog input.
Syntax
analogReference(INTERNAL2V56)
Parameters
type : INTERNAL2V56(default)(Only INTERNAL2V56 is usable,
The other option is invalid).
Returns
None
Note
In fact, if you do not call this function, analogWrite () is still valid.Voltage reference set by default and only one option is valid.
analogRead()
Description
   Reads the value from the specified analog pin.(The voltage of specified analog pin must not be greater than the reference voltage)。
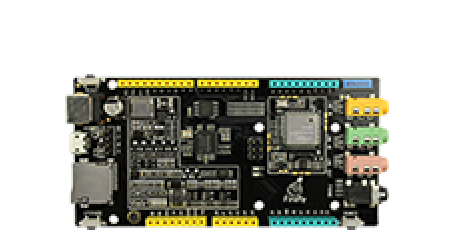
   The Fireduino board contains a 8 channel,10-bit analog to digital converter(A0~A7)。This means that it will map input voltages between 0 and 2.56 volts into integer values between 0 and 1023. This yields a resolution between readings of: 2.56 volts / 1024 units or, .0025 volts (2.5 mV) per unit.
Syntax
analogRead(pin)
Parameters
pin: the number of the analog input pin to read from(A0~A7)
Returns
int (0 to 1023)
Note
If the analog input pin is not connected to anything, the value returned by analogRead() will fluctuate based on a number of factors (e.g. the values of the other analog inputs, how close your hand is to the board, etc.).
example
int analogPin = A0;     // potentiometer wiper (middle terminal) connected to analog pin A0   // outside leads to ground and +3.3V or VCCint val = 0;           // variable to store the value readvoid setup(){
  Serial.begin(9600);          //  setup serial
  Serial.println("setup");    //  print setup when setup serial successful}void loop(){
  float voltage;                  //  variable for save the voltage of pin A0
  val = analogRead(analogPin);    // read the input pin
  voltage = (float)val / 1023.0 * 2.55;   //  calculate actual voltage of pin A0 base adc test value val
  Serial.print("adc_value is ");       //  debug info
  Serial.println(voltage);             // debug value
  delay(1000);                         //  delay 1s}
analogWrite() - PWM
Description
  1.Writes an analog value (PWM wave) to a pin.
  Can be used to light a LED at varying brightnesses or drive a motor at various speeds.
  After a call to analogWrite(), the pin will generate a steady square wave of the specified duty cycle until the next call to analogWrite() (or a call to digitalRead() or digitalWrite() on the same pin). The frequency of the PWM signal on most pins is approximately 556 Hz.
  2. This function works on all digital pins.You do not need to call pinMode() to set the pin as an output before calling analogWrite().
  3. The analogWrite function has nothing to do with the analog pins or the analogRead function.
Syntax
analogWrite(pin,value)
Parameters
   pin :  the pin to write to.
   value : the duty cycle: between 0 (always off) and 255 (always on).
Returns
None
Example
Sets the output to the LED proportional to the value read from the potentiometer.
int ledPin = 3; // LED connected to digital pin 3int analogPin = 2; // potentiometer connected to analog pin 2int val = 0; // variable to store the read valuevoid setup(){pinMode(ledPin, OUTPUT); // sets the pin as output}void loop(){val = analogRead(analogPin); // read the input pinanalogWrite(ledPin, val / 4); // analogRead values go from 0 to 1023, analogWrite values from 0 to 255}

