


TFT display picture
Update time:2018-04-13 Views:6122
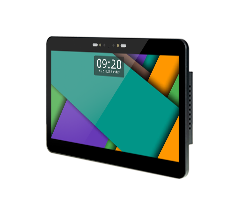
Fireduino TFT
Fireduino TFT adopt with traditional Arduino TFT belong to a series of LCD driver for ST7735S,with Fireduino through I8080 interface connection,refresh rate is faster than traditional SPI of Arduino TFT.
Fireduino TFT Library
Fireduino TFT library is based on ST7735S drive extended Adafruit GFX,Adafruit GFX is responsible for drawing graphics,ST7735S is responsible for drive LCD display,it is compatible with Adafruit GFX API,after Fireduino connect TFT,as show below:

Fireduino TFT display picture
This example introduce how to display images in TFT accessories of Fireduino,after reading the file of TF card,random location shown on the screen.
Hardware requirements
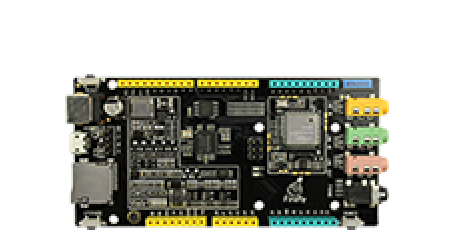
1.Fireduino board
2.Fireduino TFT board
3.TF Card
4.Image files
Code
Before the start
Use TFT screen,first of all have to contain TFT library as well as the need to use to TF library header files.
#include <TF.h>#include <TFT.h>
Define your TFT screen,and create an instance object
TFT TFTscreen = TFT();
There is a special data type is used to describe the image information,creating its objects.
PImage logo;
setup()
1.Initial screen.
2.Set the background color.
3.Static text message is displayed on the screen.
4.Initialize the serial port for print the information.
5.Initial TF card.
6.From the TF card to load the image file.
void setup() {
  // initialize the GLCD and show a message
  // asking the user to open the serial line
  delay(1);
  TFTscreen.begin();
  delay(1);
  TFTscreen.background(255, 255, 255);
  TFTscreen.stroke(0, 0, 255);
  TFTscreen.println();
  TFTscreen.println(F("Arduino TFT Bitmap Example"));
  TFTscreen.stroke(0, 0, 0);
  TFTscreen.println(F("Open serial monitor"));
  TFTscreen.println(F("to run the sketch"));
  // initialize the serial port: it will be used to
  // print some diagnostic info
  Serial.begin(9600);
  while (!Serial) {// wait for serial port to connect. Needed for native USB port only
  }
  // clear the GLCD screen before starting
  TFTscreen.background(255, 255, 255);
  // try to access the SD card. If that fails (e.g.
  // no card present), the setup process will stop.
  Serial.print(F("Initializing SD card..."));
  if (!SD.begin()) {Serial.println(F("failed!"));return;
  }
  Serial.println(F("OK!"));
  // initialize and clear the GLCD screen
  TFTscreen.begin();
  TFTscreen.background(255, 255, 255);
  // now that the SD card can be access, try to load the
  // image file.
  logo = TFTscreen.loadImage("arduino.bmp");
  if (!logo.isValid()) {Serial.println(F("error while loading arduino.bmp"));
  }}
loop()
1.Judge the correctness of the image file.
2.The location of the randomly generated images.
3.The image displayed on the screen.
void loop() {
  // don't do anything if the image wasn't loaded correctly.
  if (logo.isValid() == false) {return;
  }
  Serial.println(F("drawing image"));
  // get a random location where to draw the image.
  // To avoid the image to be draw outside the screen,
  // take into account the image size.
  int x = random(TFTscreen.width() - logo.width());
  int y = random(TFTscreen.height() - logo.height());
  // draw the image to the screen
  TFTscreen.image(logo, x, y);
  // wait a little bit before drawing again
  delay(1500);}
Example program -- TFT display picture
// include the necessary libraries#include <TF.h>#include <TFT.h>  // Arduino LCD libraryTFT TFTscreen = TFT();// this variable represents the image to be drawn on screenPImage logo;void setup() {
  // initialize the GLCD and show a message
  // asking the user to open the serial line
  delay(1);
  TFTscreen.begin();
  delay(1);
  TFTscreen.background(255, 255, 255);
  TFTscreen.stroke(0, 0, 255);
  TFTscreen.println();
  TFTscreen.println(F("Arduino TFT Bitmap Example"));
  TFTscreen.stroke(0, 0, 0);
  TFTscreen.println(F("Open serial monitor"));
  TFTscreen.println(F("to run the sketch"));
  // initialize the serial port: it will be used to
  // print some diagnostic info
  Serial.begin(9600);
  while (!Serial) {// wait for serial port to connect. Needed for native USB port only
  }
  // clear the GLCD screen before starting
  TFTscreen.background(255, 255, 255);
  // try to access the SD card. If that fails (e.g.
  // no card present), the setup process will stop.
  Serial.print(F("Initializing SD card..."));
  if (!SD.begin()) {Serial.println(F("failed!"));return;
  }
  Serial.println(F("OK!"));
  // initialize and clear the GLCD screen
  TFTscreen.begin();
  TFTscreen.background(255, 255, 255);
  // now that the SD card can be access, try to load the
  // image file.
  logo = TFTscreen.loadImage("arduino.bmp");
  if (!logo.isValid()) {Serial.println(F("error while loading arduino.bmp"));
  }}void loop() {
  // don't do anything if the image wasn't loaded correctly.
  if (logo.isValid() == false) {return;
  }
  Serial.println(F("drawing image"));
  // get a random location where to draw the image.
  // To avoid the image to be draw outside the screen,
  // take into account the image size.
  int x = random(TFTscreen.width() - logo.width());
  int y = random(TFTscreen.height() - logo.height());
  // draw the image to the screen
  TFTscreen.image(logo, x, y);
  // wait a little bit before drawing again
  delay(1500);}


